Metaphase Marketing

Lead Generation, Offline Conversions, CRM, Google Ads, Meta Ads, Closed-Loop Reporting

The Ultimate Guide to Closed-Loop Reporting in 2026

The Ultimate Guide to Closed-Loop Reporting in 2026: Connecting Ad Clicks to CRM Revenue

The 4 Pillars of Closed-Loop Reporting: Conversion Tracking, Click ID Capture, CRM Configuration, and the Feedback Loop.

As a B2B advertiser, your biggest challenge isn't generating leads; it's proving which ad clicks actually turn into revenue. Without a closed-loop reporting system, you're flying blind, optimizing for form fills instead of closed deals. This guide provides a comprehensive, step-by-step walkthrough for building a robust closed-loop system that connects your Google Ads and Meta Ads campaigns directly to your CRM, enabling true ROI-based optimization.

Key Takeaways

  • Closed-loop reporting is essential for attributing revenue back to specific ad campaigns and keywords.

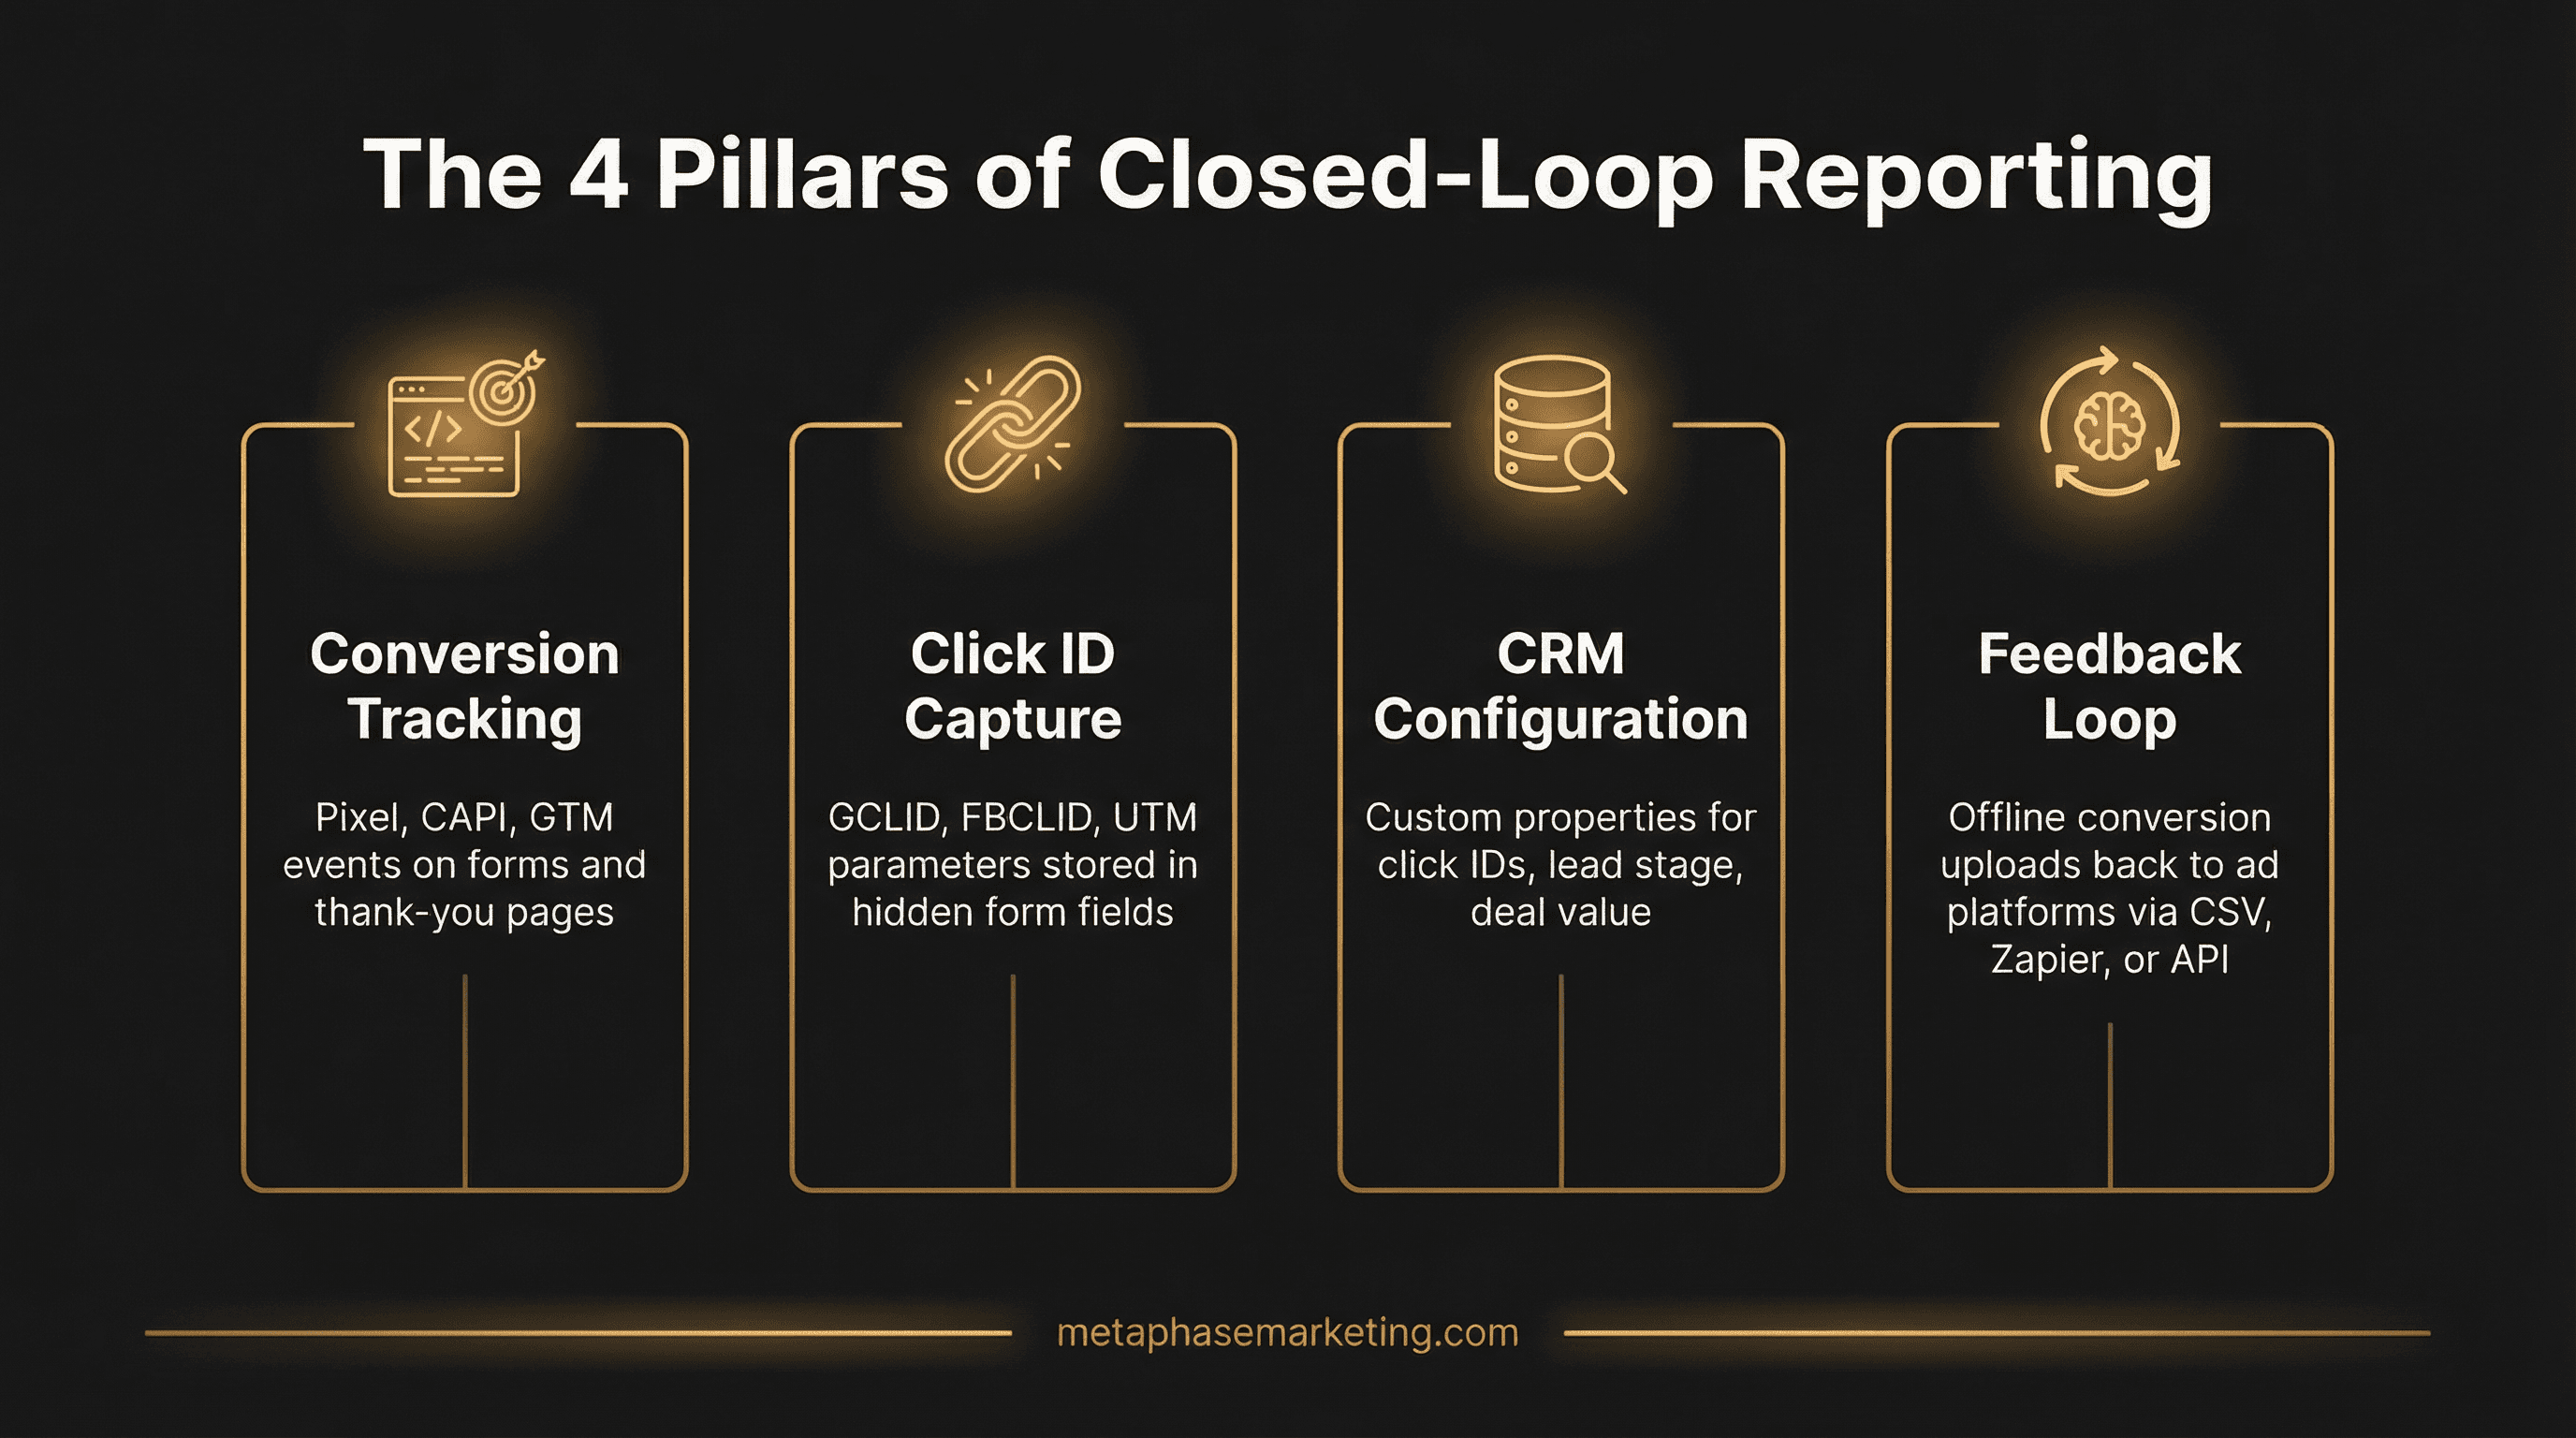
  • The system is built on four pillars: Conversion Tracking, Click ID Capture, CRM Configuration, and a Feedback Loop.

  • Capturing GCLID and FBCLID in hidden form fields is a non-negotiable first step.

  • Automating the feedback loop with tools like Zapier or Google Ads Data Manager is crucial for effective optimization.

The Four Pillars of a Closed-Loop System

A successful closed-loop system is built on four essential components working in harmony. Missing any one of these pillars will break the chain of attribution.

  1. Proper Conversion Tracking: The foundational layer, including server-side tracking and first-party data collection.

  2. Tracking Parameters: The unique identifiers (GCLID, FBCLID, UTMs) that act as the glue between your ad platforms and your CRM.

  3. Your CRM as the Source of Truth: Configuring your CRM to meticulously store lead source data and pipeline stages.

  4. The Feedback Mechanism: The automated process of sending offline conversion data back to the ad platforms.

Step 1: Capturing Click IDs with Every Lead

The entire system hinges on capturing the unique click ID generated every time a user clicks your ad. This is non-negotiable.

Implementing Hidden Form Fields

You must add hidden fields to every lead capture form on your website to store these IDs. Here is how to configure it for the most common platforms:

<!-- Example Hidden Field for GCLID -->
<input type="hidden" id="gclid_field" name="gclid_field" value="">

<!-- Example Hidden Field for FBCLID -->
<input type="hidden" id="fbclid_field" name="fbclid_field" value="">
<!-- Example Hidden Field for GCLID -->
<input type="hidden" id="gclid_field" name="gclid_field" value="">

<!-- Example Hidden Field for FBCLID -->
<input type="hidden" id="fbclid_field" name="fbclid_field" value="">
<!-- Example Hidden Field for GCLID -->
<input type="hidden" id="gclid_field" name="gclid_field" value="">

<!-- Example Hidden Field for FBCLID -->
<input type="hidden" id="fbclid_field" name="fbclid_field" value="">

JavaScript to Populate Hidden Fields

Next, you need a simple script to grab the click ID from the URL and populate the hidden field. This script should run on every page of your site.

<script type="text/javascript">
    function getQueryParam(param) {
        var regex = new RegExp("[?&]" + param + "=([^&#]*)");
        var results = regex.exec(window.location.search);
        return results === null ? "" : decodeURIComponent(results[1].replace(/\+/g, " "));
    }

    window.onload = function() {
        var gclid = getQueryParam('gclid');
        if (gclid) {
            var gclidField = document.getElementById('gclid_field');
            if (gclidField) {
                gclidField.value = gclid;
            }
        }

        var fbclid = getQueryParam('fbclid');
        if (fbclid) {
            var fbclidField = document.getElementById('fbclid_field');
            if (fbclidField) {
                fbclidField.value = fbclid;
            }
        }
    };
</script>

Step 2: Configuring Your CRM as the Source of Truth

Your CRM must be configured to accept and store the GCLID and FBCLID. Create custom properties in your CRM (e.g., HubSpot, Salesforce) for: gclid, fbclid, utm_source, utm_medium, utm_campaign, Lead Status, and Deal Value. Ensure your form submissions map the hidden fields directly to these new CRM properties.

Step 3: Choosing Your Feedback Mechanism

This is how you send the offline conversion data back to the ad platforms. There are several methods, from simple to complex, as our comparison chart shows.

Comparison chart of offline conversion feedback methods: Manual CSV, Zapier, Google Ads Data Manager, and Direct API.

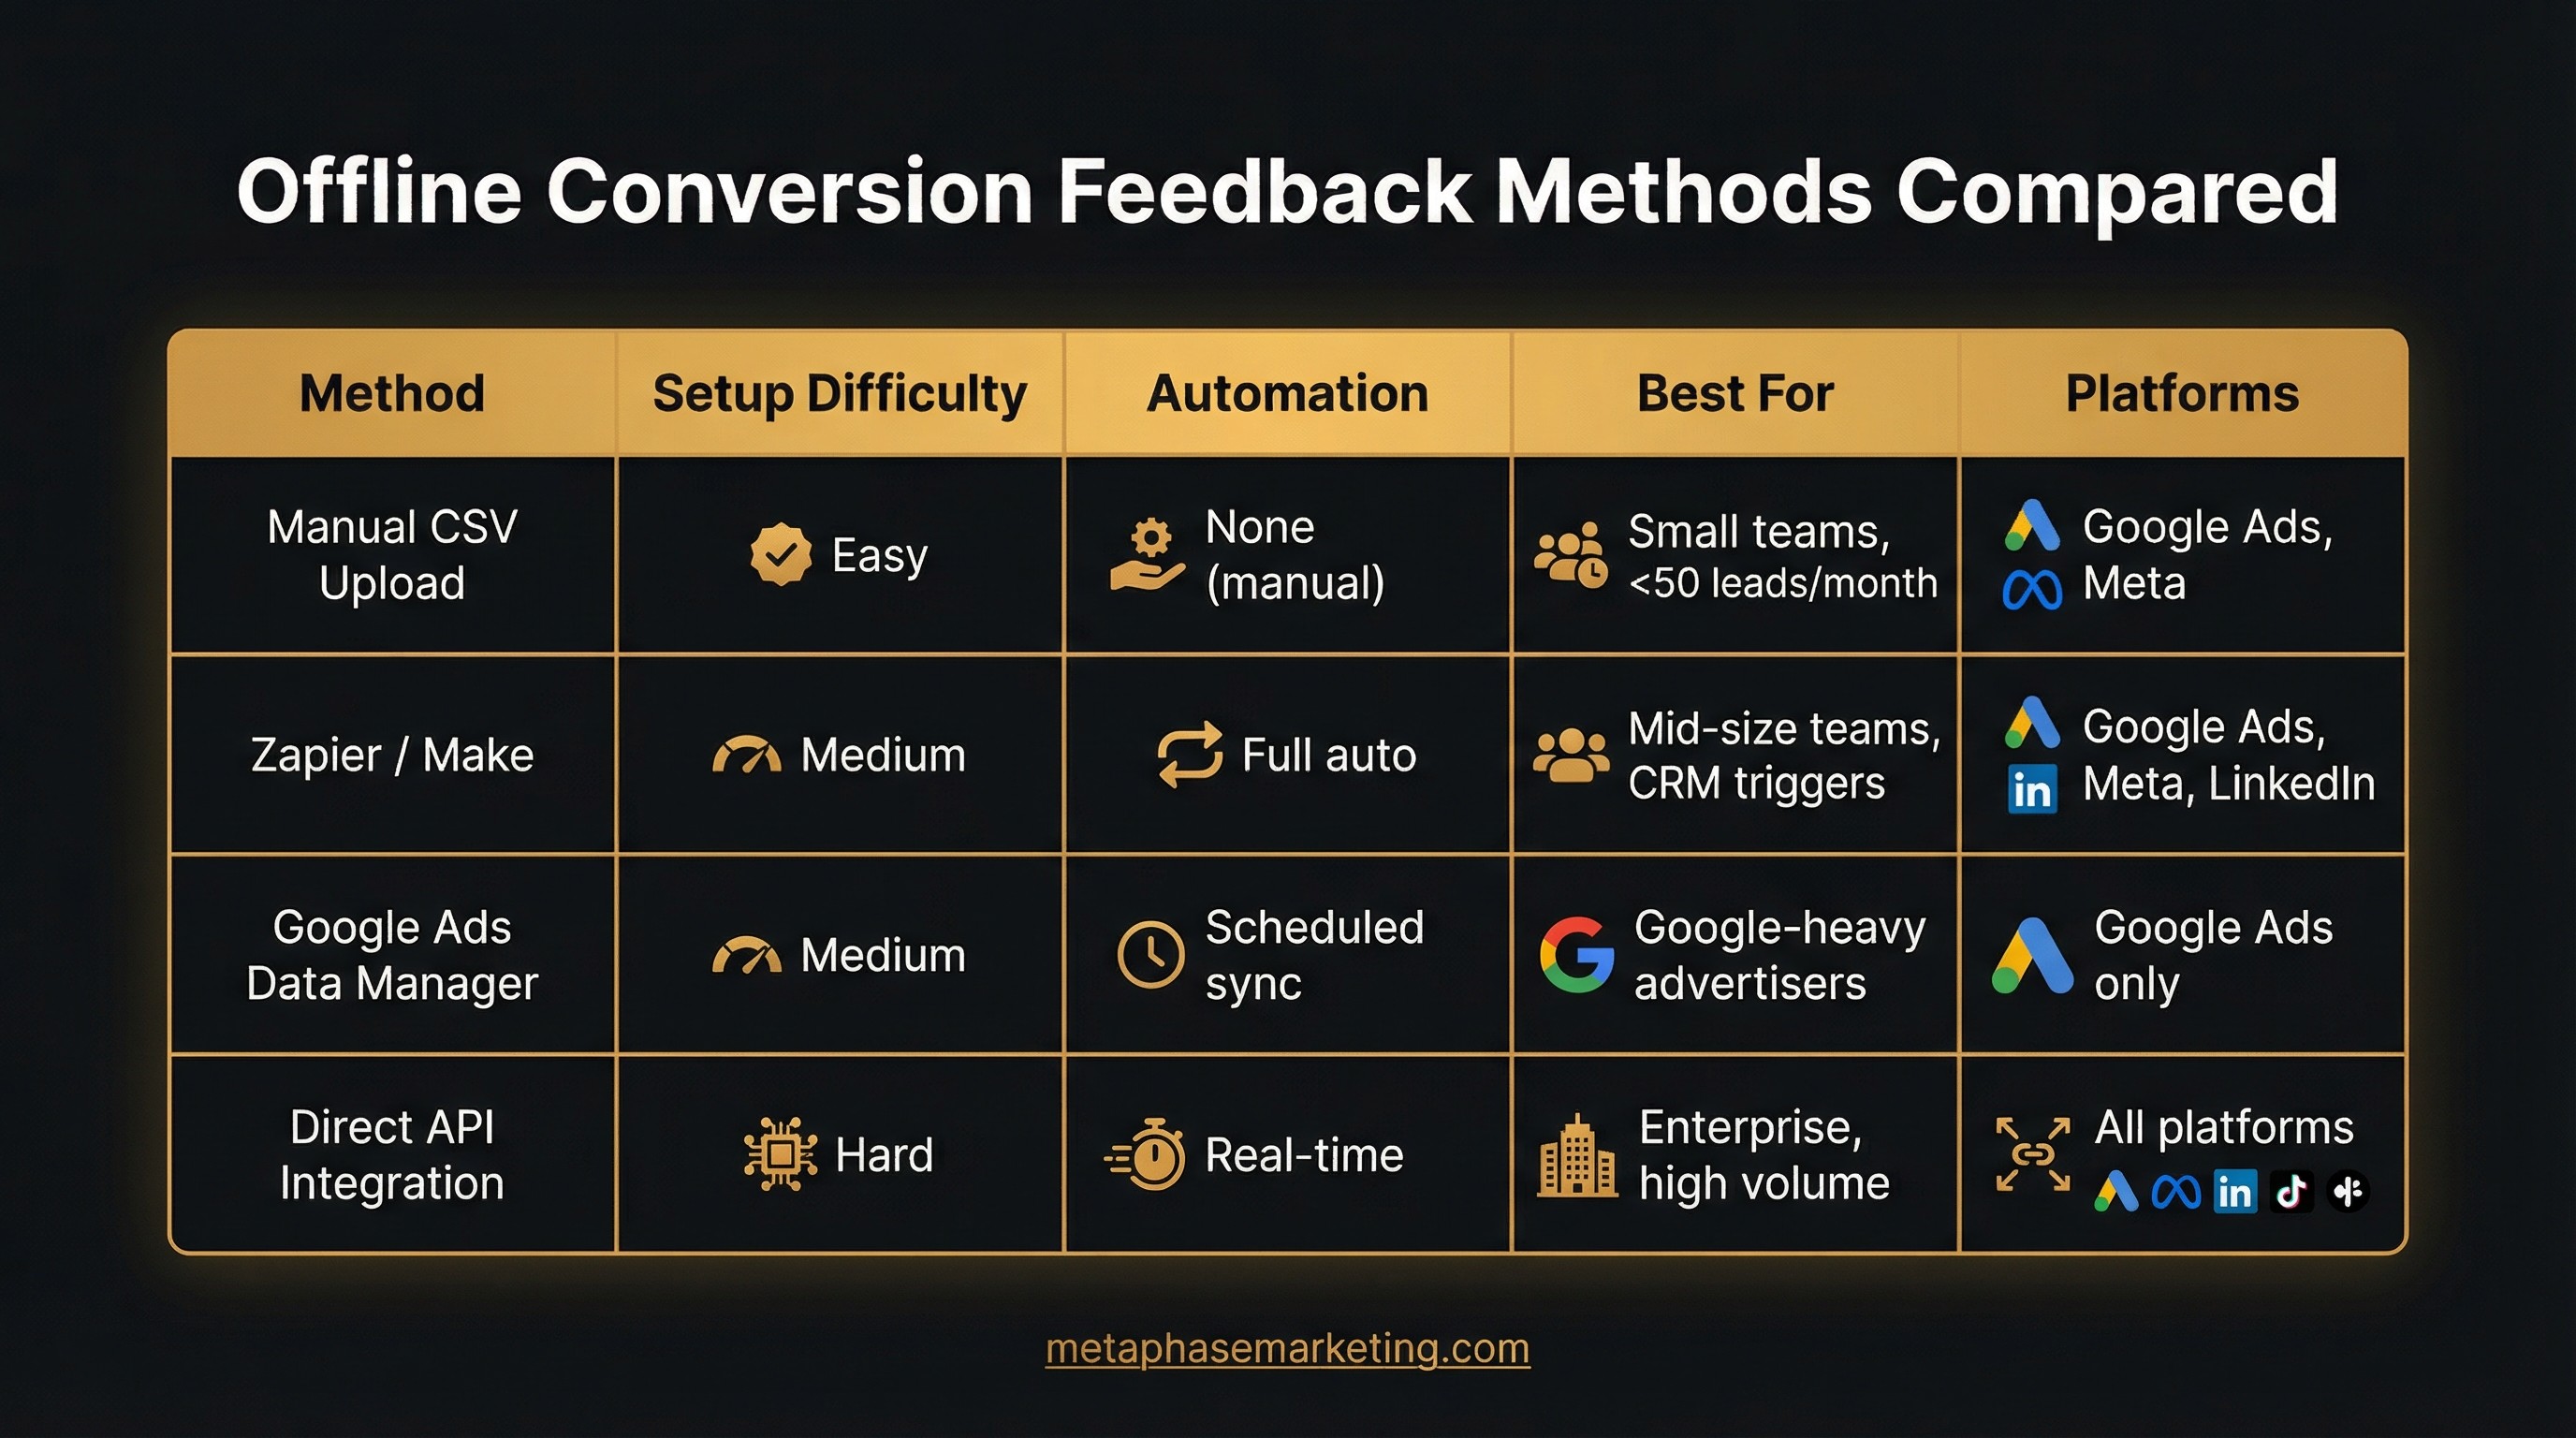
For most businesses, using a no-code automation tool like Zapier offers the best balance of ease, cost, and power. It automates the entire process without needing a developer.

Step 4: Automating Offline Conversions with Zapier (Example Workflow)

Using a tool like Zapier is the most common way to automate this process. Here is a typical workflow for sending qualified leads from HubSpot to Google Ads:

  1. Trigger: HubSpot - "Contact Property Change" (when Lifecycle Stage changes).

  2. Filter: Only continue if "Lifecycle Stage" is "Marketing Qualified Lead" AND "gclid" exists.

  3. Action: Google Ads - "Send Offline Conversion". Map the GCLID, Conversion Time, and a static Conversion Value (e.g., $100 for an MQL).

Conclusion: From CPL to ROAS

By implementing a closed-loop reporting system, you shift your optimization focus from Cost Per Lead (CPL) to true Return On Ad Spend (ROAS). You will finally have the data to confidently scale campaigns that drive real revenue and cut spend on campaigns that generate low-quality leads.

Available

Metaphase Marketing

Working Hours ( CST )

8am to 8pm

Available

Metaphase Marketing

Working Hours ( CST )

8am to 8pm

👇 Have a question? Ask below 👇

👇 Have a question? Ask below 👇

METAPHASE MARKETING

X Logo
Instagram Logo
Linkedin Logo

Let’s work together

© 2024 Metaphase Marketing. All rights reserved.

METAPHASE MARKETING


X Logo
Instagram Logo
Linkedin Logo

Let’s work together

© 2024 Metaphase Marketing. All rights reserved.

METAPHASE MARKETING

X Logo
Instagram Logo
Linkedin Logo

Let’s work together

© 2024 Metaphase Marketing. All rights reserved.