
Metaphase Marketing
Google Ads, Enhanced Conversions, Offline Conversions, Lead Generation, Conversion Tracking
Google Ads Enhanced Conversions for Leads: Complete Setup Guide

Here is a scenario that plays out inside almost every Google Ads account. The campaigns look healthy. Cost per lead is reasonable. The client is happy with the reports. Then the sales team says the leads are garbage. The pipeline is full of people who submitted a form and disappeared. The phone calls never came. The contracts never closed.
The campaign was not broken. The signal was.
When Google Ads only sees form fills, it optimizes for form fills. It learns to find the type of person who clicks and fills out fields , not the type of person who actually shows up, pays, and becomes a customer. Over time, Smart Bidding gets better and better at delivering exactly the wrong kind of lead at exactly the wrong price.
The fix is offline conversion tracking , specifically, Enhanced Conversions for Leads, which is Google's current recommended method for closing the loop between ad clicks and real business outcomes. If you are still running a legacy offline conversion import workflow, Google has deprecated it and is pushing everyone toward this new approach.
This guide walks through the complete technical setup: from GCLID capture to API upload, including hashing requirements, the Enhanced Conversions GTM setup, and what to expect from your bidding once real data starts flowing.
Key Takeaways
Google has deprecated the legacy offline conversion import and recommends migrating to Enhanced Conversions for Leads.
Every Google Ads click generates a GCLID (Google Click Identifier). You must capture it on your landing page and store it in your CRM to close the attribution loop.
Enhanced Conversions adds hashed first-party user data (email, phone number) alongside the GCLID, which improves Smart Bidding accuracy even on cross-device journeys.
Uploads can be done via CSV (small volume), the Google Ads API (automated), or native CRM integrations like Salesforce.
Bidding improvements typically begin showing within 30 days and compound significantly by month three.
What Enhanced Conversions for Leads Is (and What Google Deprecated)
For years, the standard way to import offline conversions into Google Ads was a straightforward GCLID-based upload: capture the click ID, store it in your CRM, then upload a CSV when a lead converted. It worked. But it had gaps , cross-device journeys, direct-type visitors, and leads that arrived without a clean GCLID all fell out of the attribution picture.
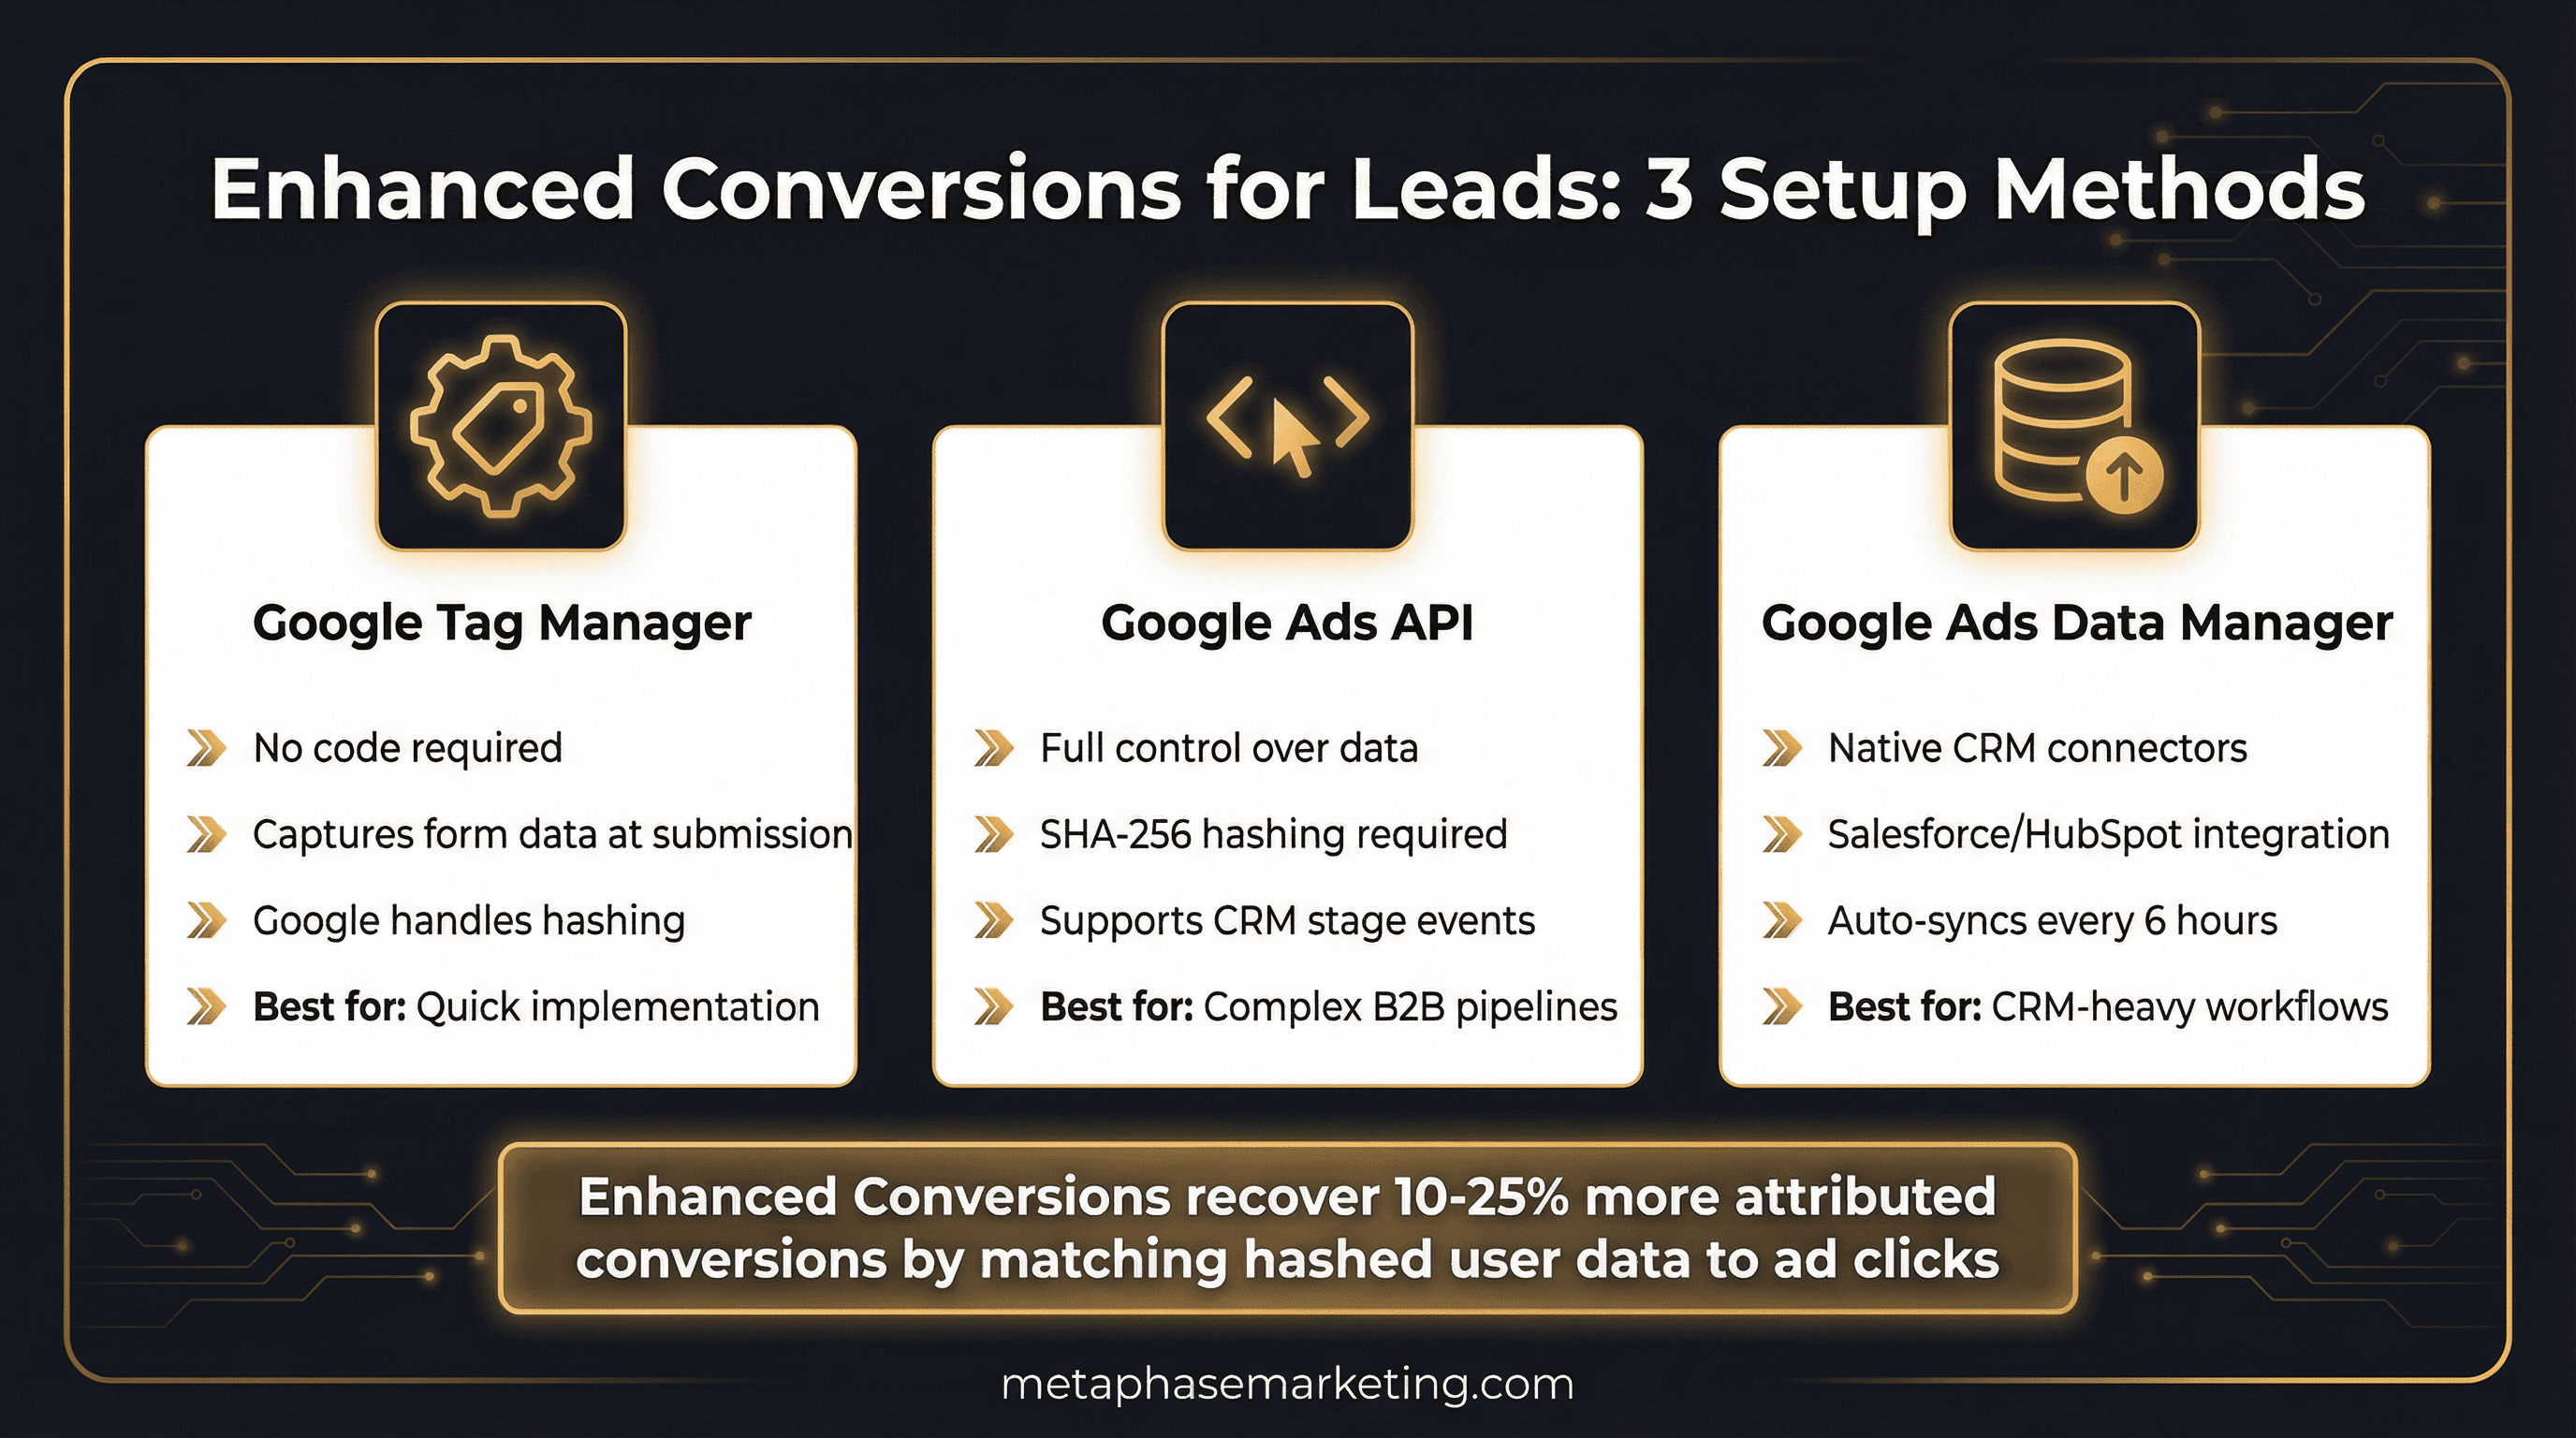
Enhanced Conversions for Leads solves this by supplementing the GCLID with hashed first-party customer data. When you upload a conversion, you include the lead's email address and phone number (SHA-256 hashed), which Google uses to probabilistically match conversions even when the GCLID is missing. The result is higher match rates and cleaner bidding signals across a wider share of your conversions.
As of 2025, Google's official documentation states they "don't recommend implementing new offline conversion workflows" using the legacy GCLID-only approach. The recommended path forward is Enhanced Conversions for Leads, implemented either through Google's Data Manager or the Google Ads API with user identifiers.
The Attribution Architecture
Before diving into setup steps, it helps to see the full data flow. Here is what happens from ad click to conversion import:
User clicks a Google Ad. Google appends
?gclid=XXXXto your landing page URL automatically (auto-tagging must be enabled).Your landing page JavaScript reads the GCLID from the URL and stores it in a browser cookie and a hidden form field.
User submits the lead form. Your server captures the GCLID alongside the lead's email, phone, and name, and stores it in your CRM or database.
The lead moves through your pipeline. When a qualifying event occurs , a booked appointment, a signed contract, a paid invoice , your system triggers a conversion upload.
You upload the conversion to Google Ads with the GCLID and hashed user data. Google matches the click to the outcome.
Smart Bidding now knows which clicks led to actual revenue. It adjusts bids accordingly.
Every step in that chain has to work for the data to flow cleanly. The most common failure point is step two: the GCLID never gets captured, or it gets captured inconsistently and is missing for a large portion of leads.
Step 1: Enable Auto-Tagging in Google Ads
GCLIDs are only appended to your URLs if auto-tagging is enabled in your Google Ads account. This is often overlooked on legacy accounts that were set up before auto-tagging was the default.
To enable it: go to Google Ads → Settings → Account Settings. Under the "Auto-tagging" section, check the box that reads "Tag the URL that people click through from my ad." Save. That is it. From this point on, every click on your ads will include a GCLID in the destination URL.
Step 2: Capture the GCLID on Your Landing Page
The moment a user lands on your page, you need to extract the GCLID from the URL and preserve it across the session. Here is the JavaScript to do that:
You also need to add a hidden field to every lead form on your site. This is the mechanism that passes the GCLID from the browser session into your form submission data:
One important note: the cookie must have a 90-day expiry. This is not arbitrary. Google's attribution window goes up to 90 days post-click, meaning a lead who clicks your ad today might close nearly three months from now. If you set the cookie to expire in 30 days, you will miss those longer-cycle conversions entirely.
Step 3: Store the GCLID in Your CRM or Database
When the form submits, your server-side handler needs to save the GCLID alongside the lead record. Here is a simplified Python example:
Store GCLIDs for at least 90 days. Do not purge them as part of any routine data cleanup. The GCLID is the thread that connects this lead record to its original ad click , once it is gone, attribution for that lead is gone permanently.
Step 4: Create a Conversion Action in Google Ads
Before you can import conversions, you need to create a conversion action that defines what you are tracking:
Go to Google Ads → Tools → Conversions → New Conversion Action.
Select Import → CRMs, files, or other data sources → Track conversions from clicks.
Name it clearly , something like "Qualified Lead," "Booked Appointment," or "Signed Contract." You may want separate conversion actions for different stages of your funnel.
Set the Category to match the business type (Lead, Purchase, or Other).
Set the Value. You can use a fixed value per conversion (useful when deal size is relatively consistent) or import a dynamic value per upload (better for variable deal sizes).
Set Count to "One" , you do not want the same lead counted twice if they trigger the conversion event more than once.
Set the Attribution model to Data-driven if your account has enough volume, or Position-based otherwise.
Note the Conversion Name exactly as it appears , you will need it in your CSV or API upload payload.
Step 5: Import via CSV (For Lower Volume)
If you are running fewer than 50 conversions per week or just getting started, the CSV upload method is the simplest path. Download the Google Ads CSV template and format your conversions like this:
Upload in Google Ads under Tools → Conversions → Upload. The timezone parameter matters , make sure it matches the timezone your CRM uses when recording conversion timestamps. A mismatch here will not cause errors, but it will shift when conversions appear in reports.
When to use this method: low volume, manual CRM workflow, quick setup before you automate. It is a good way to test that your pipeline is working before investing in API automation.
Step 6: Import via the Google Ads API (For Scale)
Once you are handling significant volume or want near-real-time imports, the Google Ads API is the right approach. Here is a production-ready Python function using the google-ads library and the ConversionUploadService:
Note the partial_failure=True setting. This is required. Without it, if any single conversion in your batch has an error (a bad GCLID format, a missing field), the entire batch fails. With partial failure enabled, valid conversions are imported and errors are reported individually so you can investigate them without losing the rest of the batch.
SHA-256 Hashing Requirements
For Enhanced Conversions, the email and phone number you send must be SHA-256 hashed before upload. Google handles this automatically when using the GTM tag approach, but if you are uploading via API, you need to hash the data yourself. Here are the rules:
Email normalization before hashing:
Strip leading and trailing whitespace
Convert to lowercase
For Gmail and Googlemail addresses specifically: remove all dots (.) before the @ symbol
Phone number normalization: Strip all non-numeric characters before hashing. No country code prefix, no dashes, no parentheses, no spaces. Just digits.
Setting partial_failure and Interpreting CLICK_NOT_FOUND
When you start uploading conversions, you will likely see a significant number of CLICK_NOT_FOUND errors. This is normal and expected , it is not a signal that something is broken.
Here is why: if you upload all conversions from your CRM regardless of source, many of those leads did not arrive via Google Ads. They came from organic search, direct traffic, referrals, or Meta ads. Google will return CLICK_NOT_FOUND for those records because there is no Google click to associate with the GCLID (or because no GCLID was captured).
The correct approach is to upload everything , including conversions without a valid GCLID. Google will silently ignore what it cannot match and credit what it can. The only conversions that actually matter for bidding optimization are the ones that get matched.
Enhanced Conversions via Google Tag Manager
If you prefer not to build a server-side upload pipeline, Enhanced Conversions can also be configured through Google Tag Manager. GTM captures form field values at submission time and sends hashed user data to Google automatically, without you building any hashing logic.
To set this up:
In Google Ads: Tools → Conversions → your conversion action → Enhanced Conversions → Turn on.
In Google Tag Manager, add a Custom JavaScript Variable that captures lead form data:
Configure the Enhanced Conversions tag in GTM to fire on form submission using this variable as the user-provided data source. Google handles all hashing automatically on its end.
The GTM approach is faster to implement and is a good starting point. The API approach gives you more control, more data fields, and works for events that do not happen in the browser (like a CRM stage change that happens days after the original form fill).
Impact: Enhanced Conversions via GTM typically recovers 10–25% more attributed conversions for accounts with significant non-GCLID or cross-device traffic.
Monitoring: Match Rate and Upload Diagnostics
After your first upload, go to Google Ads → Tools → Conversions → your conversion action → Diagnostics. This shows you:
Match rate: The percentage of uploaded conversions that were matched to a Google Ads click. Aim for above 70%. If you are below 50%, the most common cause is that your GCLID capture is not working on all pages or form types.
Upload status: Individual error codes for failed records. The most important ones are
CLICK_NOT_FOUND(normal , see above),CONVERSION_PRECONDITIONS_NOT_MET(conversion action is misconfigured), andTOO_RECENT_CONVERSION_ACTION(you are uploading conversions for a conversion action that did not exist at click time).
Note that conversions appear in Google Ads reports on the date of the original click, not the date of the upload. This means a conversion imported today for a click that happened 30 days ago will appear 30 days back in your historical reports. This is correct behavior.
Bidding Implications and Timeline
Offline conversion data does not improve bidding overnight. Smart Bidding needs a minimum volume of signals before it can adjust meaningfully, and the improvement compounds over time as more data accumulates.
Here is what the typical timeline looks like:
Week 1–2: Data starts flowing. The algorithm begins receiving real conversion signals. No visible change in performance yet.
Week 3–4: Algorithm starts shifting budget toward audiences and keywords that produce real conversions. You may see CPL temporarily increase as junk leads , the ones that look good on paper but never close , get deprioritized. This is a good sign.
Month 2: CPL stabilizes lower. Conversion rate improves because the algorithm is buying better traffic.
Month 3+: Compounding gains. ROAS improves as Smart Bidding has multiple months of revenue signals to work from.
For bidding strategy, once offline data is flowing consistently:
Target CPA: Set to 1.2–1.5x your current CPL as a starting point. Let it tighten over 30 days.
Target ROAS: Use when you are importing dynamic conversion values (actual deal or transaction amounts). This is the most powerful setting once you have 90+ days of clean data.
Maximize Conversions: Use when volume is the priority and you have a loose CPA target.
Accounts with six or more months of offline conversion data consistently outperform cold-start accounts. The infrastructure is not a one-time fix , it is an accumulating advantage.
Quality Checklist Before Going Live
Auto-tagging is enabled in Google Ads account settings
GCLID capture JavaScript is installed on all landing pages
Hidden GCLID field is present on all lead forms
GCLID cookie is set with 90-day expiry
GCLID is stored in your CRM or database on every lead record
Conversion action is created in Google Ads with correct category, value, and count settings
Test import completed with a sample GCLID (use Google's GCLID validator in the UI)
First real import confirmed , look for status "Imported" not "Import Failed"
Enhanced Conversions enabled and verified (via GTM or API hashed fields)
Attribution window set to match your actual sales cycle length (7 days for fast-close businesses, 30–90 days for complex B2B sales)
What Happens When You Get This Right
The expected impact, based on results across Metaphase client accounts:
Match rate of 70–85% on uploaded conversions (vs. 0% with pixel-only tracking)
CPL drops 10–25% by month two as the algorithm stops spending on traffic that clicks but never buys
ROAS improves 20–40% by month three as Smart Bidding locks onto the audiences that produce actual revenue
Most agencies do not build this infrastructure. They stop at the form fill and wonder why lead quality is inconsistent. The ones who close the loop between ad click and real revenue consistently outperform competitors running the same campaigns to the same audiences.
Ready to Close the Attribution Loop?
At Metaphase, we build the infrastructure that connects your Google Ads campaigns to actual closed revenue. Every engagement starts with an attribution audit , we map what your platform currently sees versus what is actually happening in your business, then close the gap.


